Apple Home app overview and guide will be a series of articles to get you familiar with the Home app. In this first part, we will check out the basics overview of the app.
General knowledge
HomeKit was first released in September 2014 along with iOS 8. The Home app itself was then first introduced and officially released back in September 2016 with iOS 10. From then on it lives on every device running iOS 10 and later. It was also added to macOS running Mojave which was released in September 2018. And you can find the Home app on any apple watch running watchOS 3 and later.
The home app allows you to control your smart-enabled devices through a Home Hub.
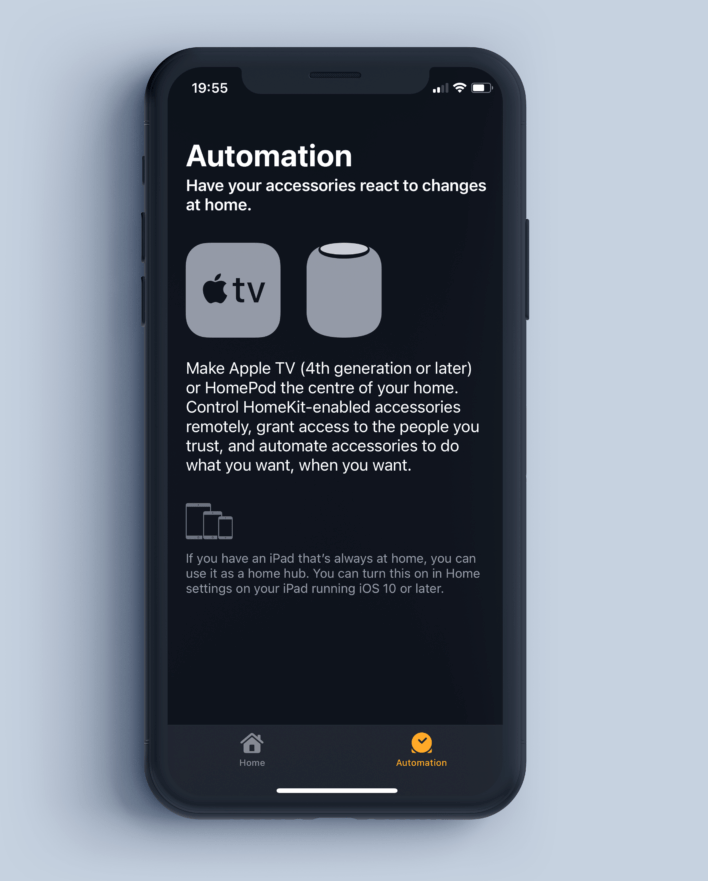
iPads, HomePods, and fourth-generation and newer Apple TVs can be used as a home hub to control HomeKit appliances remotely and set up automation. You can use even the latest HomePod mini as a home hub.
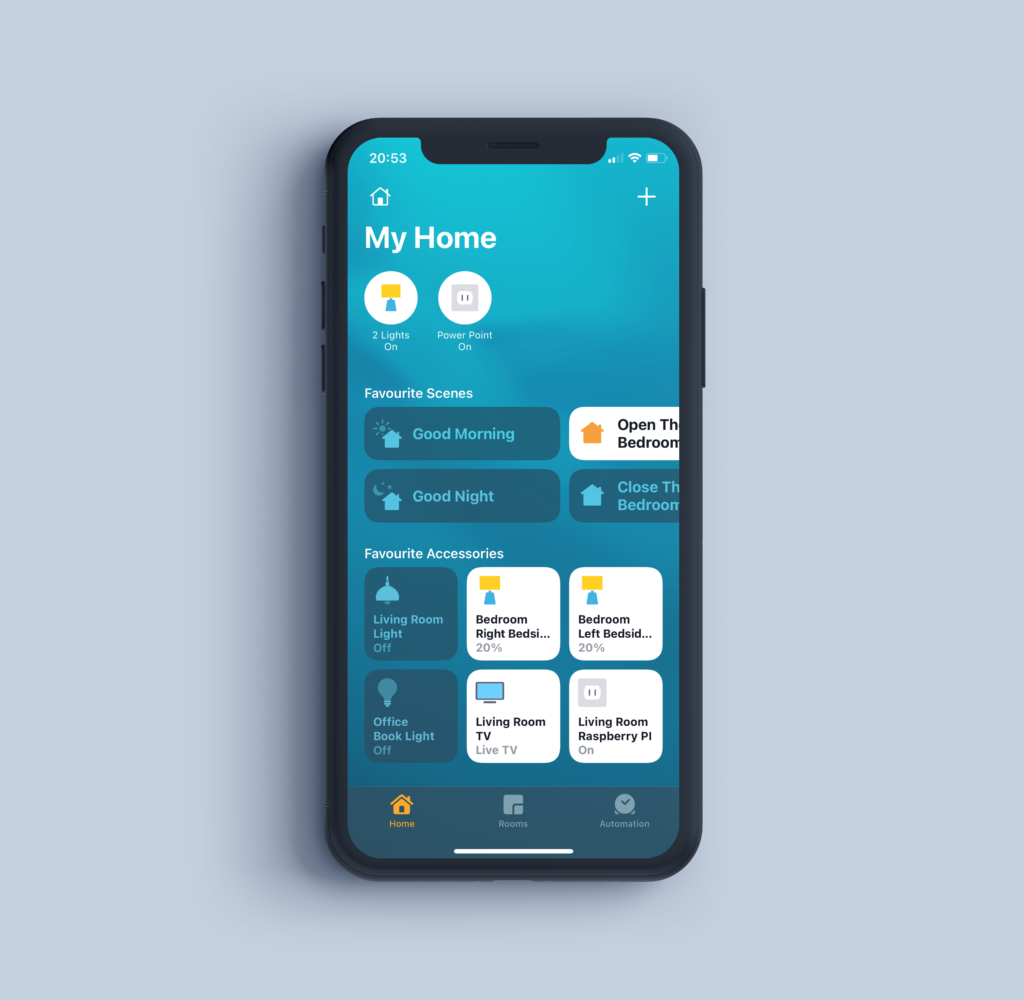
Home app overview
The first time you open the Home app you will only see the add accessory button. You can skip it for now as we will focus on the general overview now. So let’s dive into it.
At the top left corner, you will see a Home icon where you can access your home settings and specific room settings and you can edit your main screen. You can also switch to different rooms that you have in your home as well.
On the right-hand side, you will see the + sign to add new accessories to your home.
The main part of the screen is where you will see all your scenes and accessories in your home.
In the bottom part of the screen, you will again see a Home icon the Rooms icon, and the last one is the Automation icon. This is the place where you can set up different automation. The Room icon will only be visible once you add your first accessory and assign it to a specific room.
The Home icon in the bottom row is different from the one in the top left corner. The bottom Home icon acts as your home button. It will always bring you back to the home screen of the app.

Home app settings
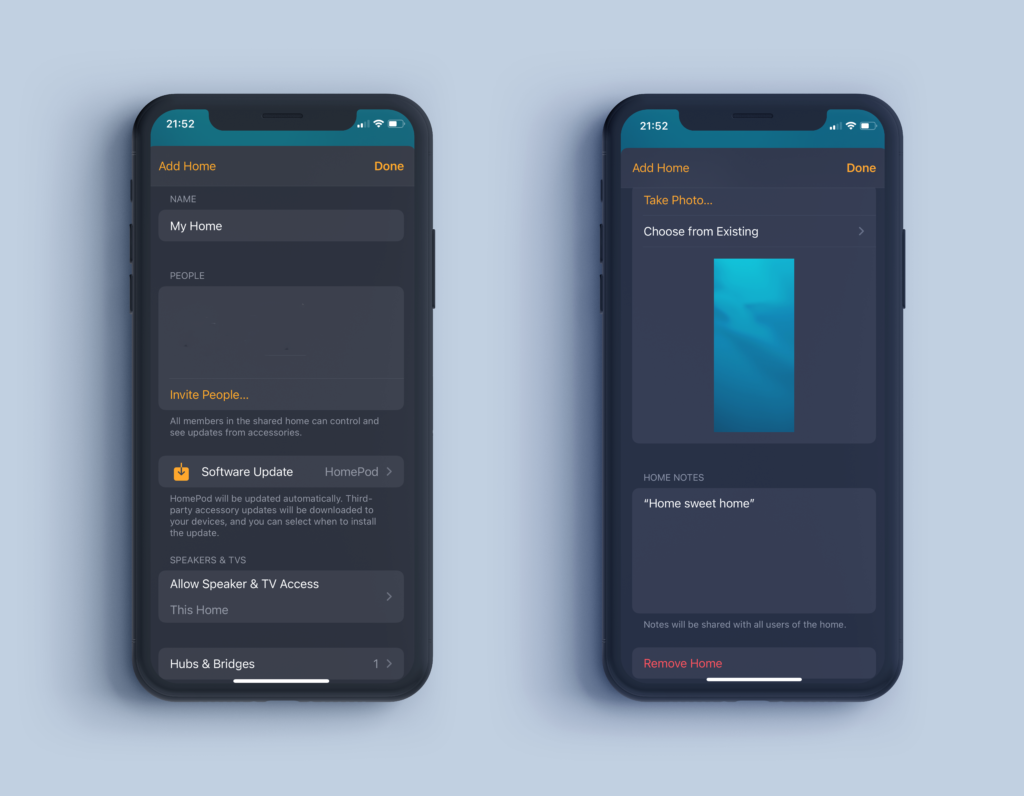
Let’s take a look at the settings. To access the settings tap the home icon in the top left corner and tap the home settings.
On the next screen, you will be able to change a few basic settings for your home.
The first thing will be the name of your home. You can enter anything you like here or you can keep it at the default My Home.
Below is the people’s section. By default, you will only see yourself however you can invite more people to your home.
By inviting more people to your home will make any new accessory you add available to others as well. It is a great option for adding family members to your home. Like this, you don’t have to set up the same accessory on each family member’s phone separately.
Below that you will see the Software update for the HomePod if you have one and you can set up your HomePod to auto-update.
Here you will also be able to see settings for a Speaker and TV access if you have AirPlay 2 enabled TV or speakers.
In the next part, you will be able to see your Hubs and bridges.
The last 2 options you will see if for changing your wallpaper in the Home app. You can also change it on a room basis.
The last part is the Notes section. You can add here any notes regarding your home, but it is also a great place to keep your HomeKit codes for your accessories.

If you are planning to control your smart home while you are away from your home or you are planning to create automations you will need to HomeHub. The Automations section will be disabled until you will set up a device as a HomeHub. Remember that the HomeHub needs to be always present in your home. If you are setting up an iPad as a HomeHub the iPad will need to be in your house at all times powered on and connected to your WiFi.

This was the general overview of the Apple Home app. In the next part, we will add our first accessory to our home so we can start to control it from our phone or with voice commands using Siri.
You can read the Apple Home app overview and guide – part 2 – Adding accessories here.
